
Last time I wrote about some setbacks. The LXNAV devices that my club owns (LX8000 and LX9000 series), do not support the 10Hz data that I require. This has been the source of a major change in the project: the introduction of modularity.
But before I discuss this major step forward, I should describe iteration 3 of the PCBA.
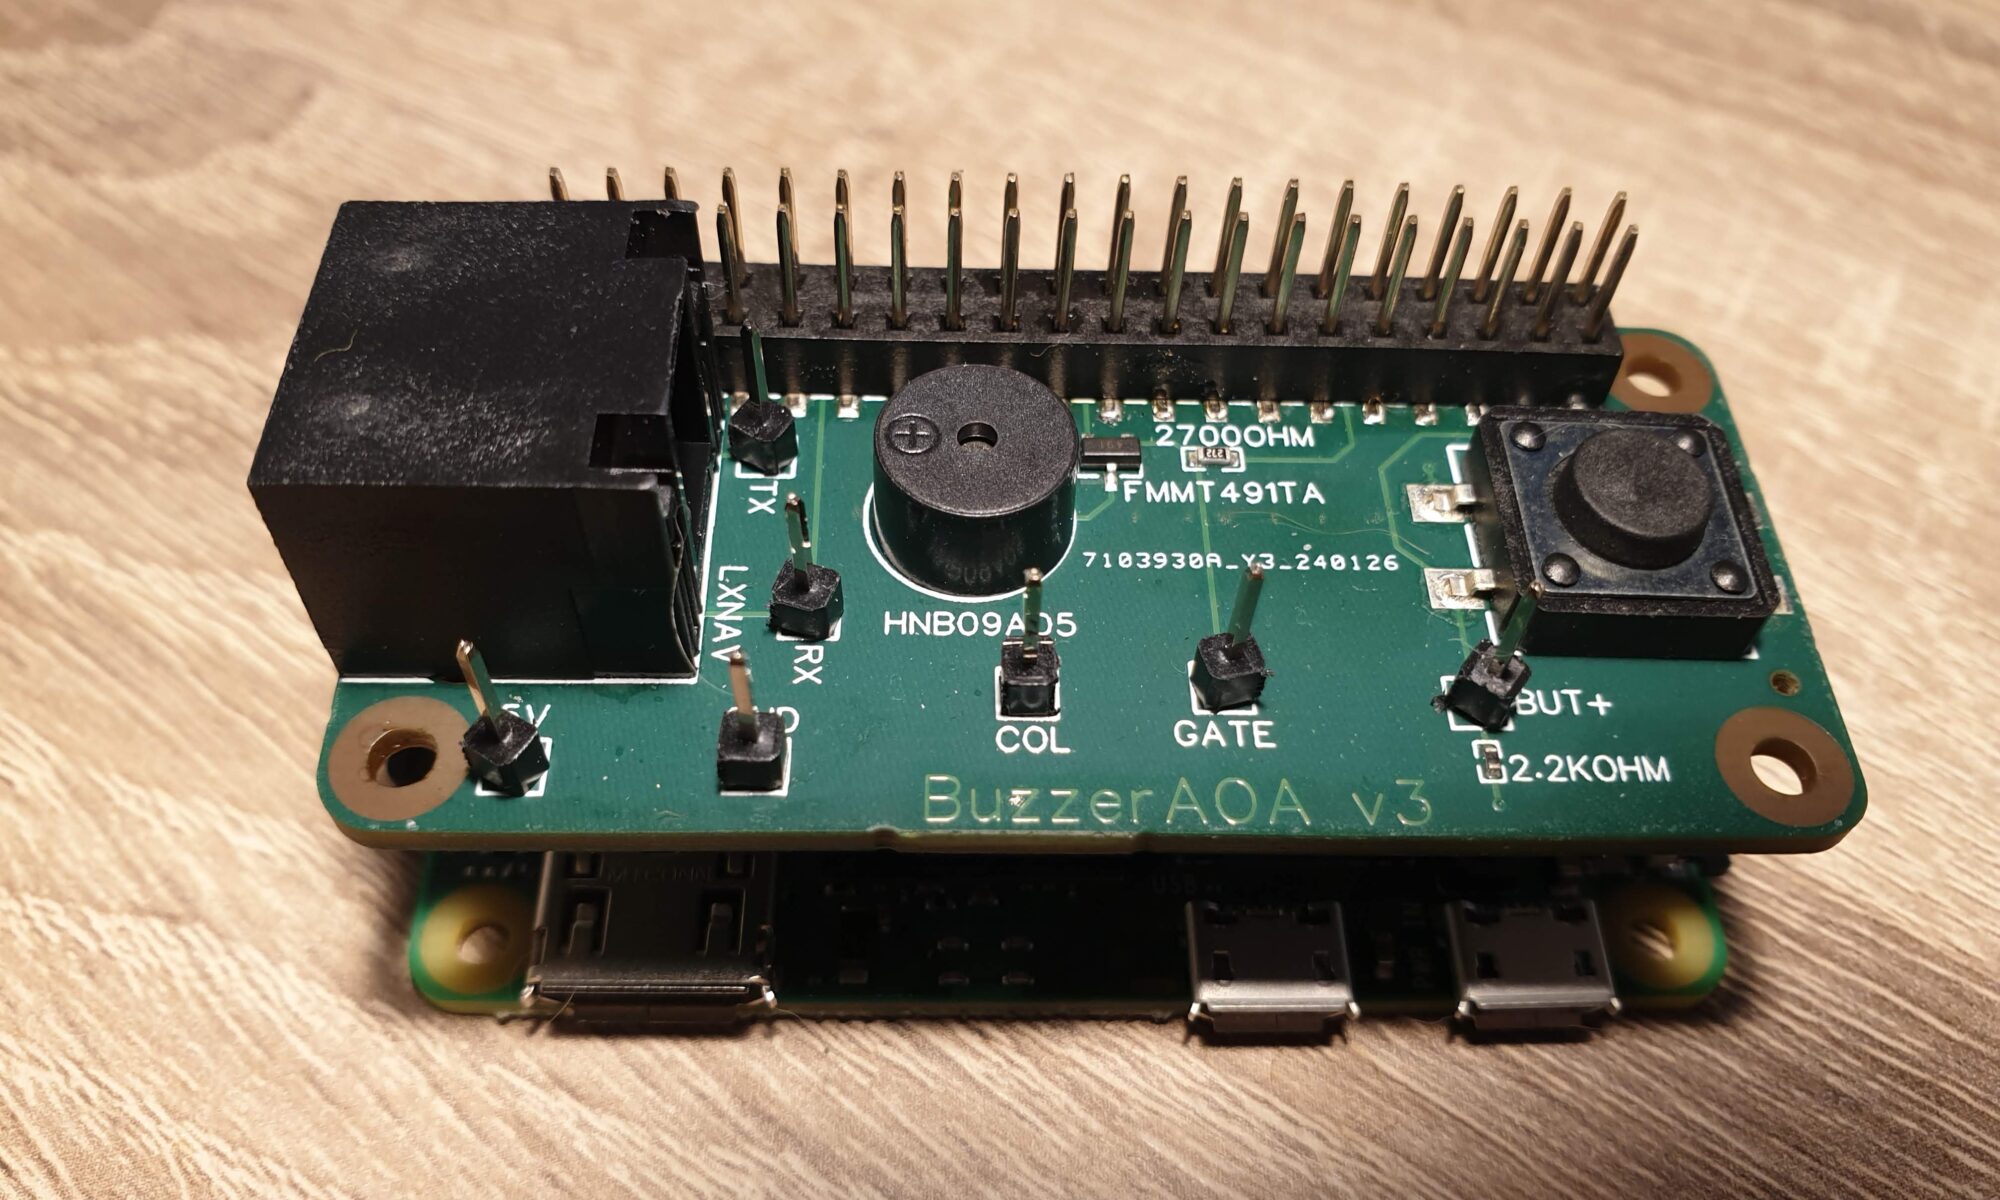
Changes in iteration 3
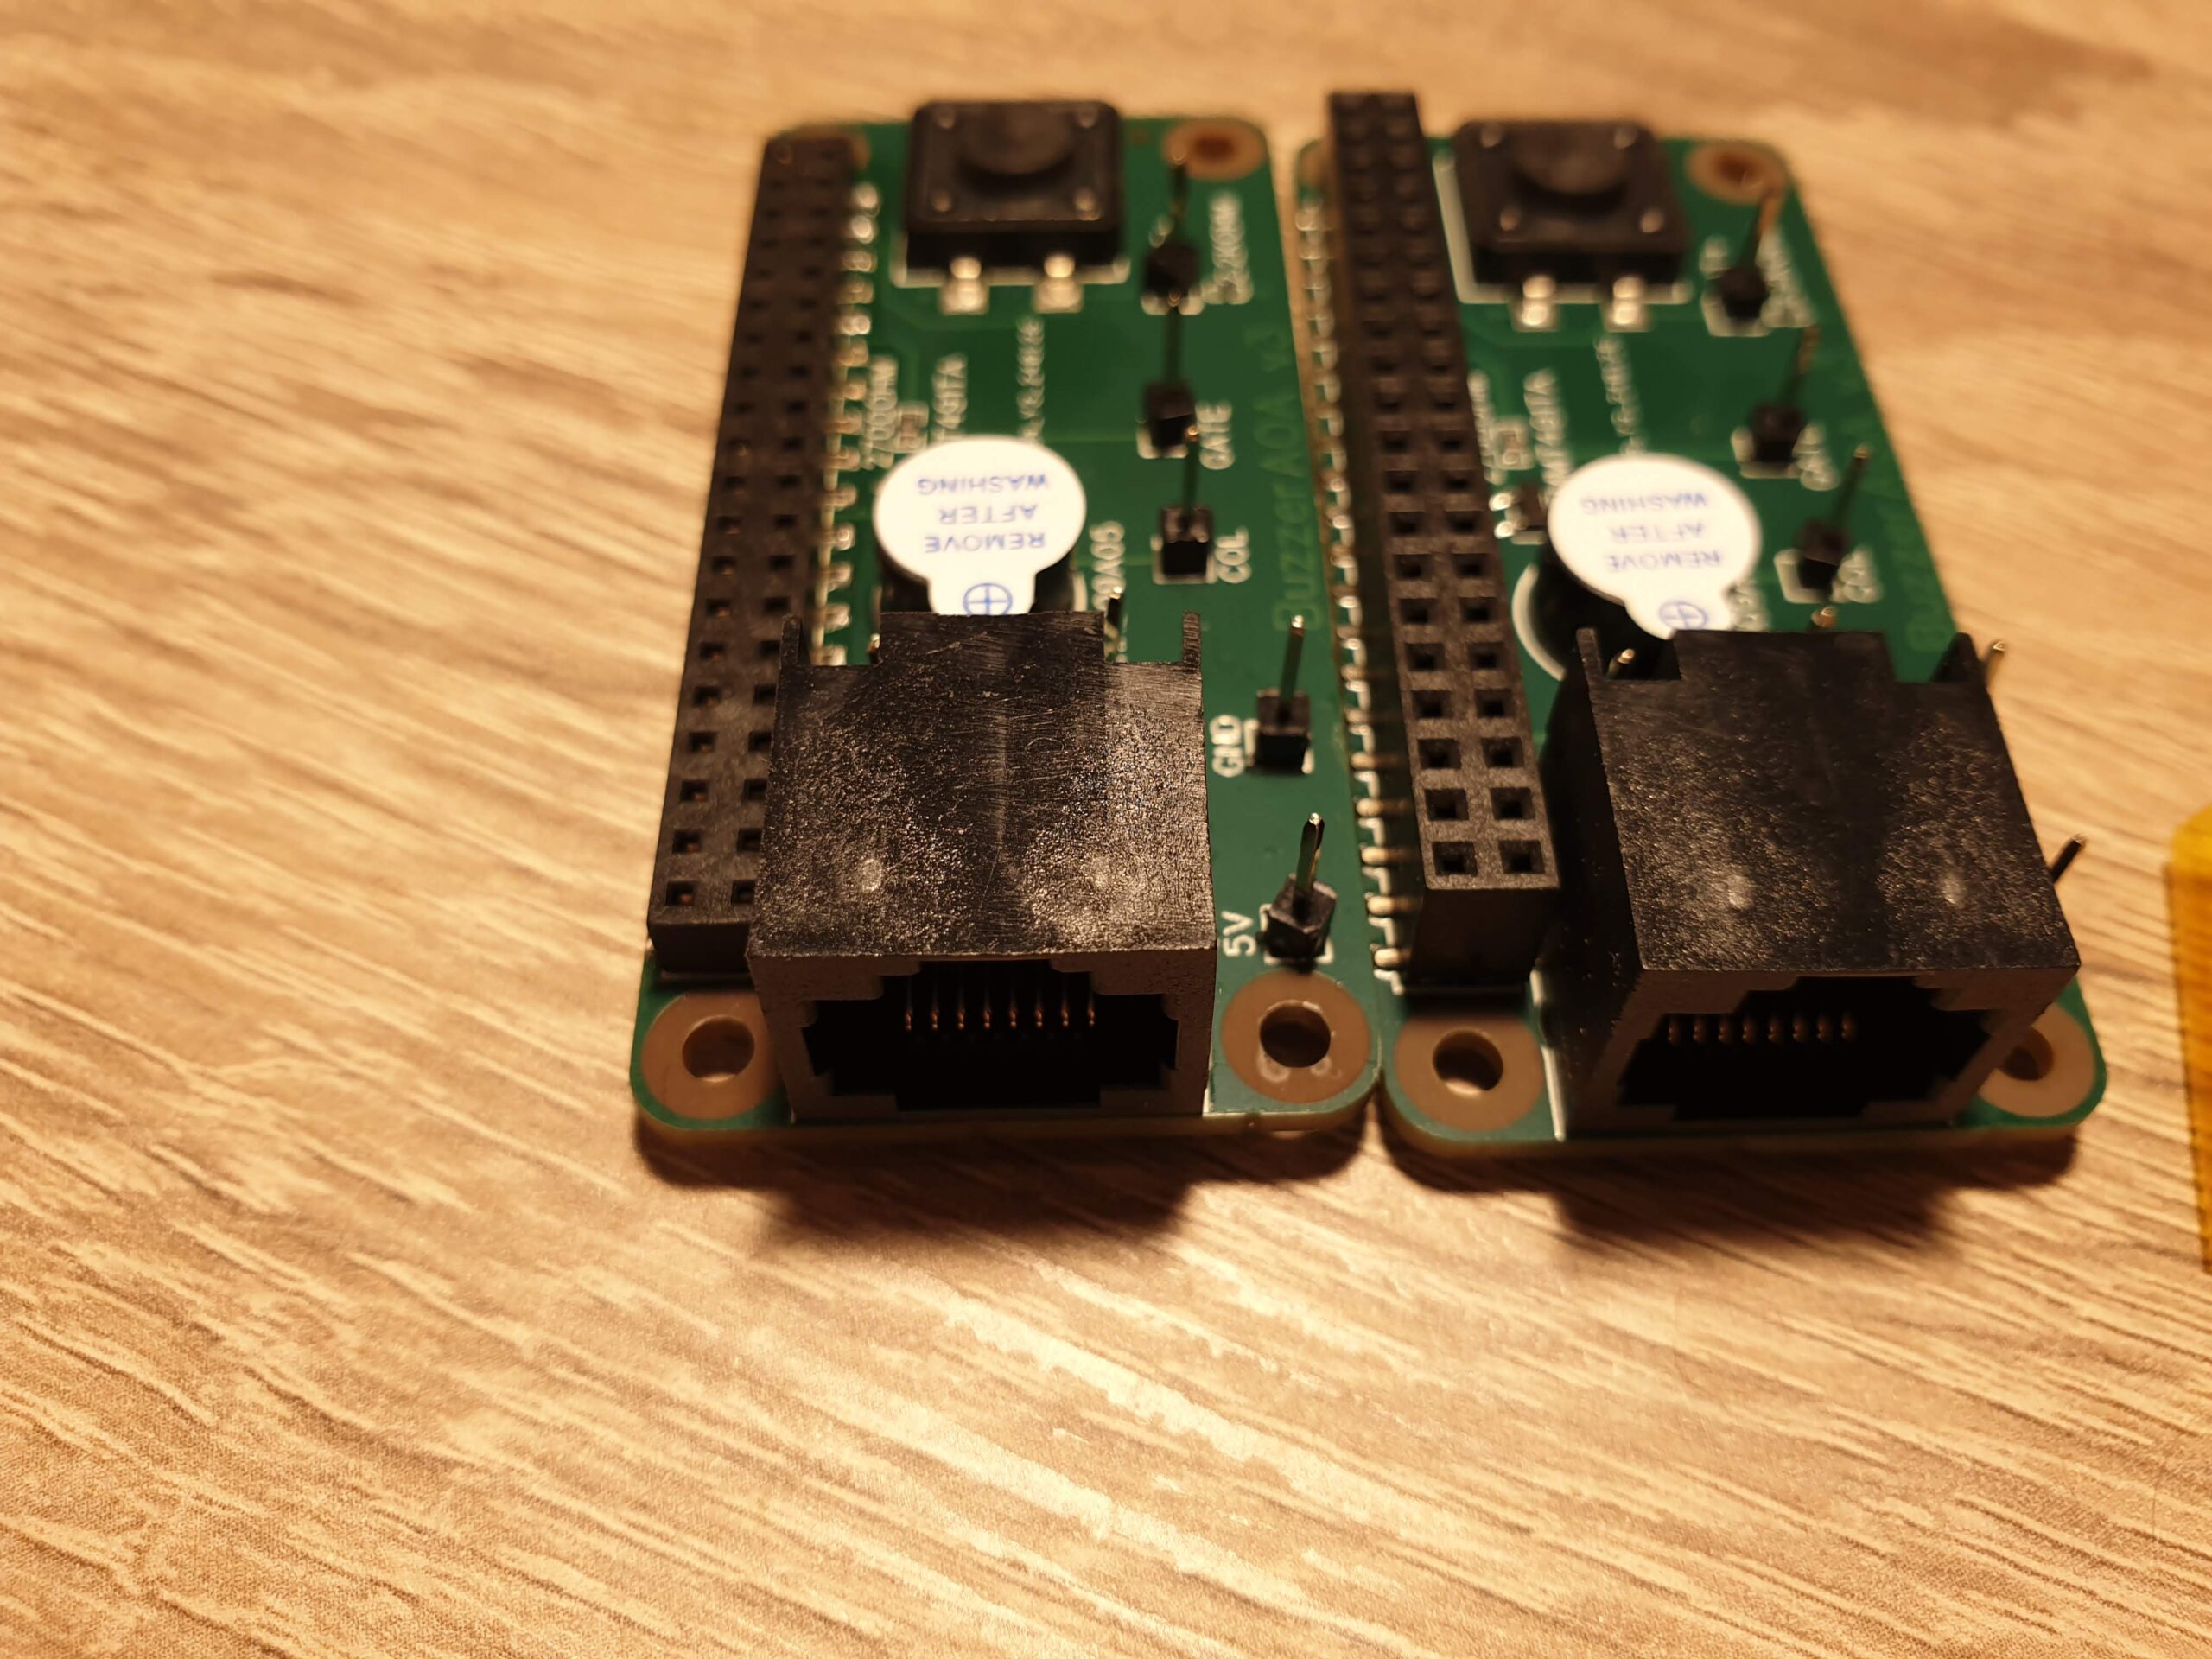
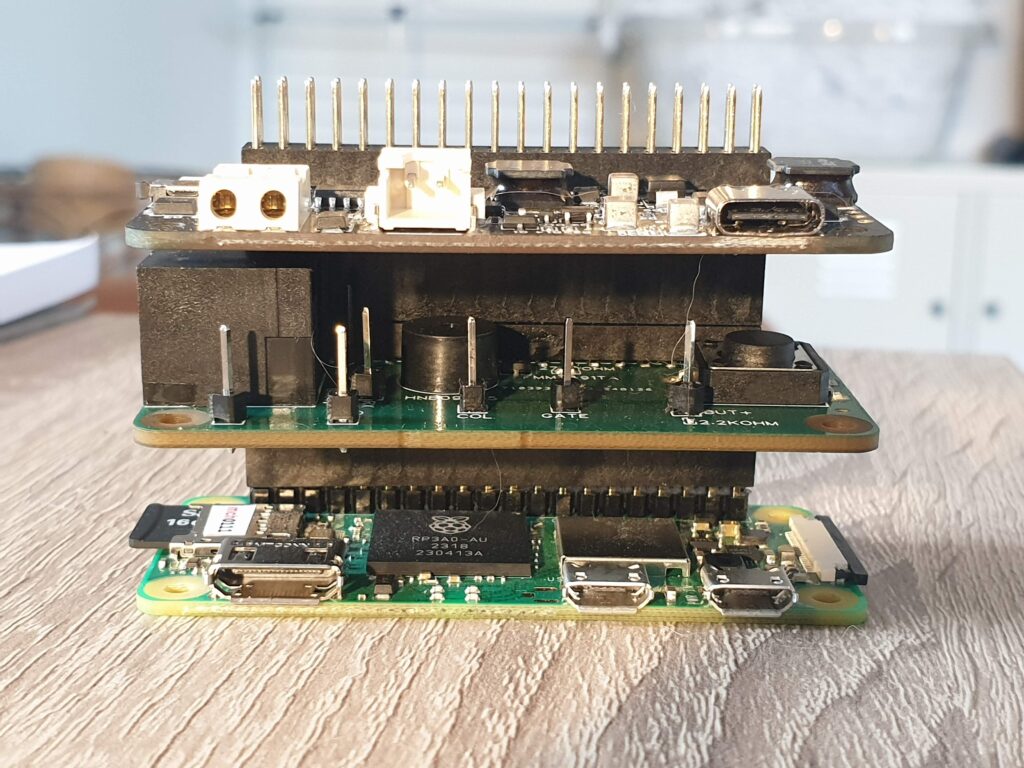
There it is. I replaced the expensive female headers at the bottom with female headers at the top. This saves about $50 per order and allows me to stack as much PCBAs on top of each other as I like. But as the picture shows, it was not easy for JLCPCB to select the correct part. Three of the received PCBAs received the tall female headers visible on the right, while two received the correct female headers visible on the left. I off course filed a complaint, which was handled very nicely. The next batch of PCBAs is on it’s way to me as I’m writing this, and I’m curious how they turn out.
Another change is in the buzzer. As mentioned, the previous version had a 3.3V buzzer which was powered by the Raspberry Pi. Because the Pi can only supply a grand total of 51mA (at 3.3V) over all the GPIO pins combined, this solution wasn’t a very good way forward. Iteration 4 contains an NPN-transistor, which I toggle with the Pi’s GPIO pin. The transistor then allows about 200mA to flow directly from the +5V rails to the buzzer. Since the +5V rails is directly connected to the LXNAV device, I have about 1000mA available here. Much better than the 51mA of the GPIO pins!
This version also has the debug pins spaced more evenly over the board, because the lack of spacing was a hazard for shorting two pins in the previous version. The crocodile ground clamp on my scope is simply too large. I did not repeat the GND pin everywhere as well.
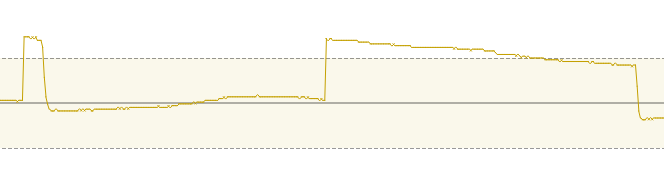
Buzzer changes for iteration 4
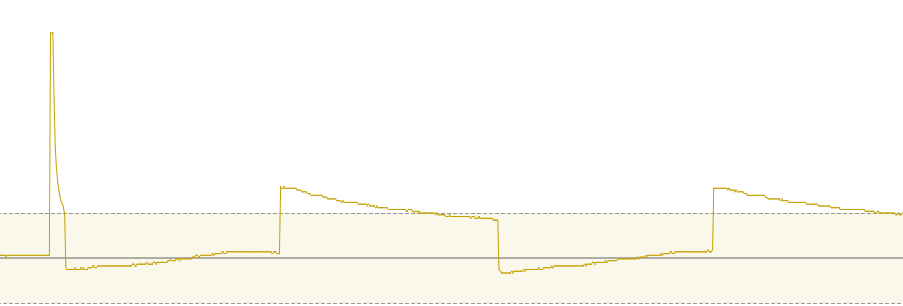
While testing iteration 3, I stumbled upon something that nobody really saw coming. When the transistor cuts the circuit between the Buzzer and GND, huge voltage spikes occur. They were clipped at 25V by my scope, and they appear to be periodic at about 2.2kHz and last about 15 milliseconds. This is suspiciously close to the 3kHz frequency of the buzzer. The electronic experts I consulted suspected it is the membrane of the buzzer which is still vibrating. A colleague was kind enough to solder a diode between the two pins of the buzzer, which should allow any excess current to flow to the +5V line. A quick check with the scope shows this is true: I see no spikes exceeding +7V now, which is great.

Modularity
The last thing to address is the issues I noticed when testing iteration 3 in the workshop of my gliding club: our LXNAV devices don’t send out the data I require to operate!
This has several solutions:
- I am now actively looking for private owners who have a glider with an LXNAV S80 or S100. My current hardware should work with those devices, and it provides me with the data.
- I am creating a separate version to support LX Navigation devices.
- I am considering adding my own accelerometer and seeing if the 1Hz Indicated Airspeed as provided by my club’s gliders is enough to test the system.
Point 2, supporting LX Navigation devices, makes life difficult. Whereas LXNAV provides me directly with 5V and TTL-level UART data, the LX Navigation devices provide me with 12V power and RS232-level UART data. To make matters worse, their pinout is exactly opposite from LXNAV!
After a lot of considering, I decided that this warrants splitting my single PCBA into two separate PCBAs: one for input (UART and Power) and one for output (Button and Buzzer). I can then create two different Input modules – one for LXNAV and one for LX Navigation – and iterate the Output PCBA independently.
The two modules are stacked on top of each other, using the stacking mechanism that I introduced in Iteration 3.
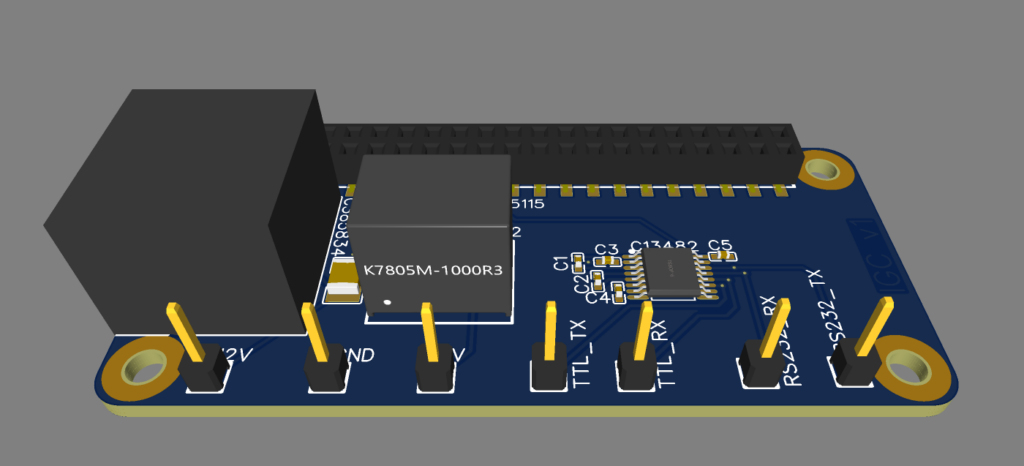
As I’m writing this, the first iteration of the LX Navigation Input Module is on it’s way to me. Since I now have to change the voltage from the 12V battery (providing anywhere between 9V and 18V) to the 5V that the Raspberry Pi requires, I have had to introduce a complete DC-DC Converter module. In order to change between RS232 voltage levels and TTL voltage levels, I have had to include a MAX232-like chip. It was a nice step up from the easier circuits that I had to make before. I’m eager to learn if I got it right. If everything works, this version should also be compatible with other devices that adhere to the IGC standard pinout, like LX Navigation does. That means it should also work with devices like the XCVario.
Future plans
As the hardware is getting more and more mature, there are some things that I still have not addressed…
I have not performed any ElectroMagnetic Compatibility (EMC) testing. This is something that I should really do before I the system in a glider. The device might otherwise interfere with other on-board electronics. Especially the radio is susceptible to interference in my experience.
I have not made any enclosure for the device yet. An aluminium enclosure might help prevent any EMC issues too. However, I am not yet skilled with 3D modelling. The PCBA design tool I’m using, EasyEDA, does include a 3D modeller for enclosures. Perhaps that is the easiest solution, as JLC also provides 3D printing and CNC services.
There is the aspect of fault detection and fault handling. I have not yet added the LEDs that I talked about last time.
Which brings me to perhaps the most important aspect: getting feedback. Despite all my talk about iteration, I still have to get my hardware airborne. I hope next month I will get the first user feedback.
2 Replies to “Towards an Audio Angle of Attack Indicator – Part 4: Modularity”
Comments are closed.